A selection of my latest bakes

Your pictures and fotos in a slideshow on MySpace, eBay, Facebook or your website!view all pictures of this slideshow

Monday, February 4, 2013

Cakes by Sally

As some of you might know, Facebook is the latest and quickest way of reaching friends, old and new. I have started a cake page on there called Cakes by Sally. 
I started cake decorating and making flowers with sugarpaste one year ago, and it is an exciting journey. Learning new things every day. I love it.
I have attached a small sample of my work here for you to see and I will try to put something here each week for you.
If you would like to order a cake from me, please contact me here or visit my Facebook page.
Rich fruit cake, with the fruit steeped in brandy, then covered in fondant.
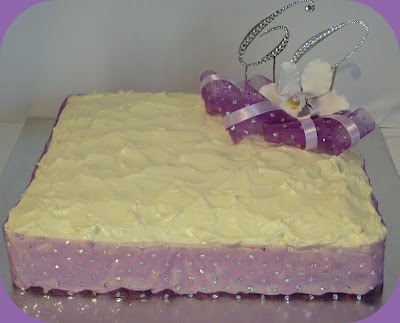
White chocolate mudcake covered in tie dye look fondant and sugar paste fantasy flowers.
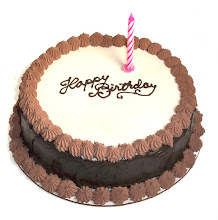
Two tier 1st birthday cake, caramel mud cake, covered in fondant, teddy bear, blocks, flowers and butterflies are all sugar paste.

Saturday, November 5, 2011

Iced Ginger Ring.

Was in need of some comforting food and really taste as well this afternoon. So I made this and boy! did it hit the spot. Ginger is so good for the tummy and the digestive system. Now I should have used all golden syrup but I didn't have enough, so used some treacle, which gave it that lovely dark colour.

Prep time 20 minutes... Cooking time 35 minutes.

Ingredients..
340 g Self Raising Flour.
1 tablesp. Bicarb of Soda.
1 tablesp. Ground Ginger.
1 tablesp. Ground Cinnamon.
170 g Sugar (I used white)
170 g Butter.
110 g Golden Syrup.
110 g Treacle.
2 Eggs.
230 mls Milk.
120 g Glazed Ginger (chopped)

Method...
Melt butter, sugar and golden syrup in a saucepan, stirring the whole time.
Set aside to cool.
When cooled, add the rest of the ingredients, leaving the chopped ginger to last.
Mix well. I used a wooden spoon.
Grease a ring tin (or loaf tin) and bake in the oven at 180c (less for fan-forced) for 35 minutes.
Allow to cool and ice with a runny icing.

I dare you to stop at one slice. Enjoy.

Tuesday, August 2, 2011

Margarita cupcakes with a Lime glaze.


Boozy cupcakes for adults, had fun making these.
Taken and adapted from an American lass called Gail Wagman.

You will need..
150gms S.R. Flour. (sifted)
125gms unsalted Butter (room temp)
150gms Sugar.
3 Eggs.
1 tablespoon finely grated Lime rind.
2 tablespoons Tequila.


Lime Glaze
2 tablespoons fresh Lime juice.
150gms Icing Sugar.
1 tablespoon Tequila.
Green food colouring.
Coarse Salt and Lime slices for decoration.


Method....
Preheat oven to 180c
Cream the butter and sugar until very pale and fluffy.
Add eggs, 1 at a time and beating well each time.
Add the lime rind and Tequila.
Fold in the flour until it is all absorbed.
Fill the cupcake cases 1/2 full or a little over. (We need room to put the glaze on later)
Place the cupcake trays in the oven for 20-25 minutes, when touched they should spring back.
Allow to cool, while you make the glaze.


In a bowl, put the icing sugar, lime juice and Tequila and mix until totally smooth. Now add the green food colouring to the desired green and mix well.
Spoon over the cupcakes and smooth a little. This will level out itself in a few minutes.
Decorate with lime slices and a straw for fun. Sprinkle the coarse salt over the top, not too much now.
Makes between 15-18 cupcakes (depending on their size)

Tuesday, February 15, 2011

Cinnamon and Sultana Cakelets.

A delightful little cake to have with a cup of tea.
You will need..
1 cup of black tea (no sugar)
1 and 1/2 cups Sultanas.
2 Eggs.
1 and 1/2 teaspoons ground Cinnamon.
1 and 1/2 cups S.R. Flour.
1/2 cup Milk.
125gms unsalted Butter (room temperature)
155gms Raw Caster Sugar (or normal caster sugar)
Cinnamon Sugar (to finish)
Method..
First up, make the black tea and put the sultanas and tea in a bowl to soak, set aside.
Preheat the oven to 180c and place cases in little cake tray.
Cream butter and sugar together until light and creamy, add 1 egg at a time and mix. Now put in the milk.
Sift the flour and cinnamon together and fold in to the butter mix. Drain the tea from the sultanas and mix gently in to the batter.
Spoon in to the cases until 3/4 full. Place in the now hot oven for 20 minutes or until cake skewer comes out clean.
While still hot from the oven, sprinkle cinnamon sugar over the top of each one and allow to cool.
Enjoy at any time of the day with a cup of tea.

Tuesday, February 1, 2011

Carrot Cake for 35 people

What a FAB and GROOVY 60th Birthday I had. It was themed The Sixties. Everyone came in sixties dress, we had sixties music and as close as possible sixties food. The cake was Carrot cake, first started in the sixties by the vegetarian hippies. (I didn't know that)
I did one large cake that would feed 35 people and 24 cupcakes.
This was the first time I have made such a large cake, and was really worried about the centre cooking and rising as it should, so used a new product to me called a cake core, made by Wilton, which you place in the middle of the tin with the cake batter in it and around it. Cooks very evenly and simple to use.

Find the cupcake recipe in my *labels*Ingredients...
2 2/3 cups S.R. Flour (sifted)
2 2/3 cups Plain Flour (sifted)
4 1/4 teasp Ground Cinnamon.
2 3/4 teasp Ground Ginger.
1 1/2 teasp Ground Nutmeg.
2 teasp Bicarbonate of Soda.
475 ml Rice Bran Oil.
2 1/2 cups Brown Sugar.
8 Eggs.
3/4 cup Golden Syrup or Honey.
1.1 kilos finely Grated Carrot.
2 cups Sultanas.
1 cup finely chopped Walnuts.


Preheat oven to 180c and grease and line a 30 cm/12 inch tin.
Sift together in a large bowl, the first 6 ingredients and mix with a wooden spoon. Make well in centre and set aside.
In another bowl, mix the oil, sugar, eggs, golden syrup.
Pour in to the flour bowl and stir in well.
Now fold in the rest of the ingredients and pour in to the prepared tin.
Place in centre of the oven and cook for 2 hours and 30 minutes. (Mine didn't take that long because I used the WILTON CAKE CORE) So keep checking yours every half an hour, we don't want it to burn now do we?
For the icing, I used Philli cream cheese, a little butter, vanilla extract and icing sugar.
This cake will store well in an air tight container for up to a week (I did this and iced it the day before required) or will freeze for up to 2 months.


Sunday, January 16, 2011

The new year

A huge apology for not being around as much of late. So many things have kept me away from blogging. My old oven dying and having to learn the new one. The pressure cooker also died, but now have a you beaut electric one, which I am also learning about.

Christmas was at our house this year and I did the full formal Christmas dinner, made special by using Ron's fabulous Apricot glaze on the turkey. Thank you The Merlin's Menu blog.

Now it is full steam ahead, getting ready for my 60th birthday party, which is themed 60's. Did a test run on the marque yesterday, and it will fit where we want it to go. Guest invites have been sent, food organised, tablecloths, plates, cutlery all got. I will be making my own cake, but keeping the design and flavour secret.
Photo of Chocolate and blackberry Torte made yesterday. Chocolate mouse at the bottom, blackberry compote and mascapone in the middle and fresh cream and a crumbled Flake on the top.
Wishing you all a properous NEW YEAR.

Tuesday, October 5, 2010

Musk sticks and Mint twigs


Although I had never heard of these in my childhood (sad) I certainly made up for it when I was buying my own sweets and lollies, when newly married and emigrated to Australia. I now have a grand daughter I can make them for and sneak a few in to myself. (Ha ha ha ha)
Ingredients...
1 teaspoon unflavoured GELATINE
1/3 cup WATER.
1 teaspoon GLUCOSE SYRUP.
500g ICING SUGAR.
1-2 teaspoons MUSK STICK FLAVOURING. (or mint essence for mint twigs)
Few drops PINK food colouring (or green for mint twigs)
Piping bag with 1cm star nozzle.
Method...
Line a couple of trays with baking paper. In a small saucepan over a low heat, heat the glucose syrup, water and gelatine, until the gelatine has dissolved.
Take pan off the heat and stir the mixture. Get a large bowl and your electric hand mixer. Transfer the mix into the bowl with 1/3 icing sugar, mix on low speed until combined.
Add another 1/3 icing sugar and mix until combined.
Add the remaining icing sugar, colour and flavouring and mix until well combined.
Transfer to the piping bag with the nozzle in and pipe 4cm sticks on to the baking trays.
Allow to air dry for 6-8 hours (mine took 12 hours, if you did them thinner it won't take as long)
Store in a airtight container at room temperature.
****Note****
The musk essence (oil based) can be got from here...

Sunday, October 3, 2010

Strawberry cheesecake

Having played around with many food processors in the past and not been happy with any of them, I have finally found one that works for me. A BREVILLE ICON BFP650. In the recipe book that comes with it is a lovely recipe for a lemon cheesecake, but I wanted to make a strawberry one so I have adapted it. Here's what I did. Ingredients....

250g pkt plain sweet Biscuits.
125 Butter (melted)
250g Cream Cheese (cubed and softened)
400g can sweetened Condensed Milk.
125ml Cream.
1 tablespoon Gelatin powder.
10ml boiling water.
2 teaspoons Strawberry essence.
2 punnets Strawberries. (half a punnet diced and reserve the rest sliced for the top)
2 tablespoons of strawberry Jam.
A little boiling water.

Method...

With butter, grease a 20cm spring form tin and set aside.
Melt the butter in the microwave on 50% power and allow to cool. Break the biscuits in to quarters and place in processor and pulse until finely crushed. Add melted butter slowly through the food chute and process until combined. Remove crumb mixture from bowl and press in to spring form tin, over the base and up the sides.
Place cream cheese, condensed milk and cream in to the food processor and combine but don't over do this. Melt the gelatin in the boiling water and stir well, add this and the strawberry essence to the cheese mix now and pulse for a second or two. Stir in the diced strawberries and put in to the biscuit case in tin. Put this in the fridge now to set, this can take up to three hours, mine was done in two hours.
Place the sliced strawberries on the top in a pattern to suit yourself. Add the boiling water to the jam and brush on with a pastry brush to give the strawberries a lovely glaze.


Wednesday, September 29, 2010

Carrot cake cupcakes

These are so delicious, when I first made them last week, I took the smallest bite just to taste and then like a starving teenager rammed the rest in my mouth.
Leave out the nuts if you wish, but I think adding the sultanas is a must. They go so well with the sweetness of the carrot.

Ingredients..
2 cups S.R. Flour.

1/2 teaspoon of Salt.
2 teaspoons Ground Cinnamon.
4 large Eggs.
1 cup white Sugar (or Raw sugar)
1 cup Rice Bran Oil. (or Canola)
2 cups raw Carrots (finely grated)
1 cup Granny Smith's Apple (finely grated)
1 cup Walnuts (chopped, saving some for the top)
1 cup Sultanas.

For the Cream cheese icing..
1/2 cup Butter (room temperature)
1 pack of Cream Cheese (room temperature)
3 cups of Icing Sugar (sifted)
2 teaspoons Pure Vanilla Extract.

Method..
Preheat oven to 180c and use the middle rack in the oven. Put papers in 24 muffin cups.
In one bowl sift the flour, salt and cinnamon together, then set aside.
In another bowl whisk together the eggs,sugar and oil until slightly thickened. Fold in the flour mix into the egg mix, then fold in grated carrots, grated apple, chopped nuts and sultanas. Divide mix between the 24 cases and bake in the oven for 20 minutes or until skewer comes out clean. Allow to cool.
Meanwhile, make the cream cheese icing.
Mix the butter and cheese together with a hand held mixer until combined. Add the vanilla extract and mix again. Slowly add the icing sugar mixing the whole time so it stays smooth.
When cakes have cooled, top each one with the cream cheese icing, decorate with the left over walnuts and sprinkle with cinnamon sugar if you desire.
Now see if you can fit a whole one in your mouth!!!!
Enjoy.

Saturday, September 11, 2010

My new oven

My new oven went in a week ago now and it's fabulous. I adore it, going to do a lot more baking and cooking with this oven, far more than with the old one.
It's an EMILIA, made in Italy. The top or hob has a fish burner, wok burner and three other burners.
The oven is gas, as the top is too. But the grill inside the oven is electric (handy) There is also a fan in the oven, so no more hot or cold spots. You can fit two 12 cup muffin trays on each shelf, now that is large! Love it, no more waiting for first batch to cook before putting in the next.
Under the oven is a warming drawer, now that will be handy when the weather is cold (yes it does get cold here in Australia)
My last oven was a white one, yes, this is stainless steel and will take a bit to get used to. But so far I am enjoying the cleaning and polishing of it.

Friday, September 10, 2010

More cupcakes

Same recipe used here as before (see labels) but with cocoa and/or coffee added.


Thursday, September 2, 2010

Nigella Forum

For those of you that no longer want to be part of the NEW NIGELLA page, there is another option.
Violet's Pantry.
http://violetspantry.forumup.org
Mention on the application that you were on Nigella's forum or that you saw this on my blog as we don't want spammers. We are a friendly forum and welcome like minded people. You can also post your foodie photographs if you wish.
Come and meet new friends or catch up with old ones. Look forward to meeting you there.